How to Make Paper Pots for Planting Seeds
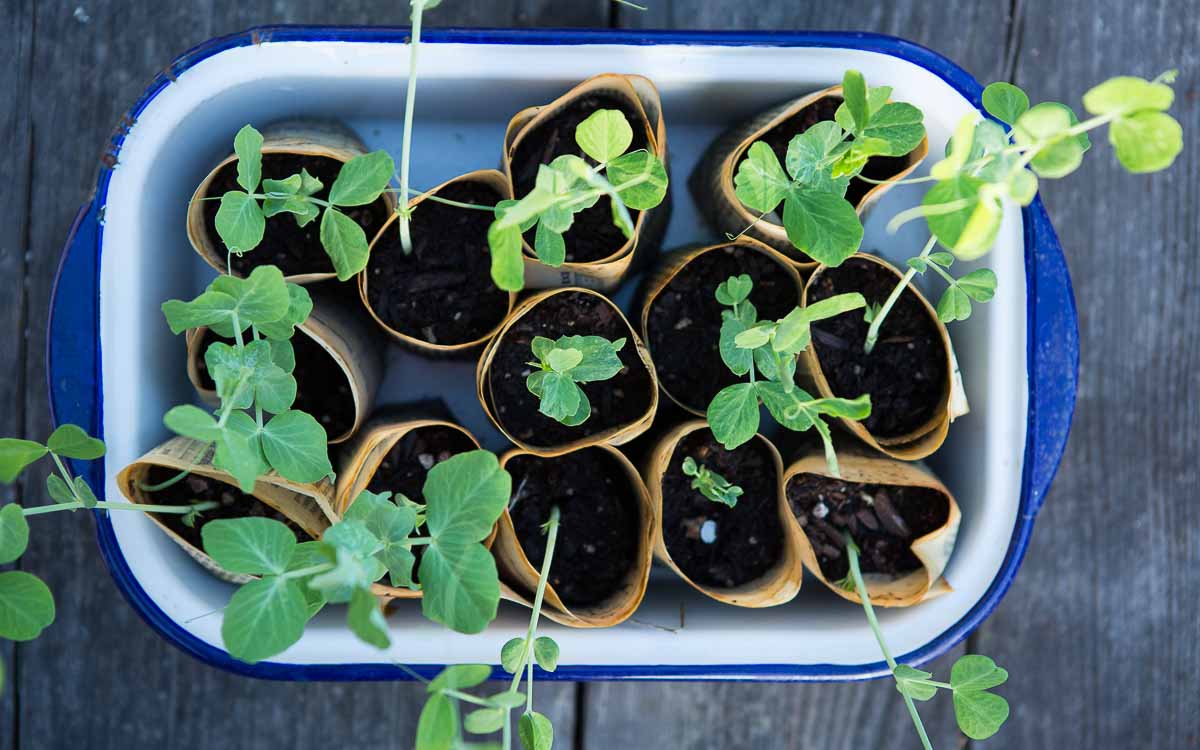
It’s easy to make paper pots for planting seeds. All you need is a can and some newspaper. Add soil and seeds, and you’re halfway to a garden.
There are many things I love about paper pots for sowing seeds, but here are the top 3:
- You can make them from things you already have at home. They’re budget-friendly, 100% recycled, and biodegradable. No plastic needed.
- They perform incredibly well when placed in a tray or pan, like the one pictured, and watered from the bottom. Simply fill the tray one quarter to half full with water. The water wicks up through the soil as the soil dries out. You always know your seeds have the water they need simply by keeping the tray reasonably full. Plus the paper holds together like paper mache, becoming stronger with watering. (It really truly doesn’t fall apart.)
- Finally, you can plant the whole thing out in the garden, paper pot and all. This is wonderful for all sorts of seedlings because they can be transplanted with little to no disturbance to the roots, giving plants the best possible start. Paper pots are also helpful when growing plants that, as a rule of thumb, don’t like being transplanted (as long as plants don’t form a tap root, like with carrots). You can cheat with paper pots. Cool, right?
Make Your Own Paper Pots
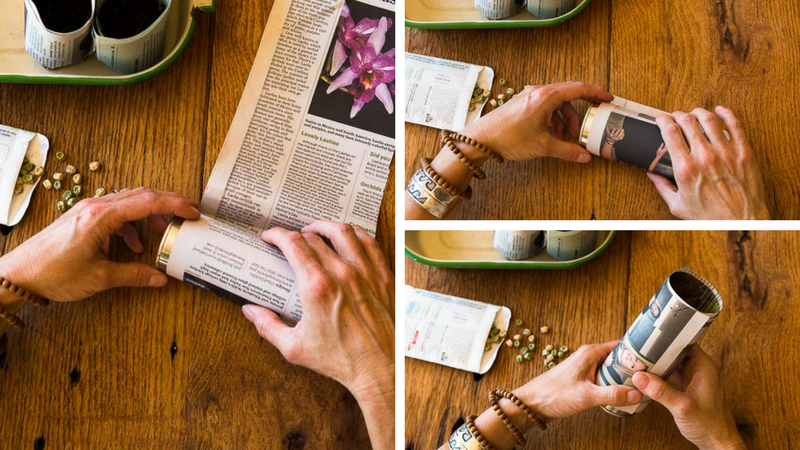
1. First, gather up your supplies. You need newspaper that has been cut down the middle, making a half a sheet. Keep the full length, the more paper the stronger the pot. You also need a tray or baking pan, and a can. I like to use a tomato paste can with one end opened and one end intact.
2. Place your can at the edge of the newspaper, letting the lip of the can hang off one side. Make sure the open end of the can is facing the long end of the newspaper.
3. Roll loosely, guiding the paper as you go so it stays nice and straight. It’s important to roll loosely to accommodate the lip of the can, however not so loosely that the pot comes apart. (You’ll see what I mean when you get to step 5.)
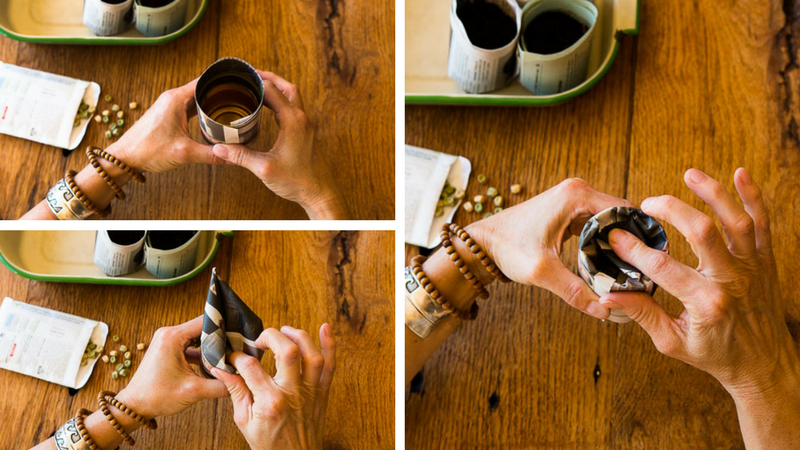
4. Lift the paper and can up, holding them together, and begin pushing the newspaper into the open end of the can starting at the seam of the newspaper (where the end of the newspaper forms a tail), and work your way around. It only takes about 3 pushes. There’s no need to fuss with this part too much. Just make sure you don’t push the paper in so far it’s against the interior walls of the can. Your goal is to form the bottom of the pot, so you want the seams to come together and form a barrier that holds soil.
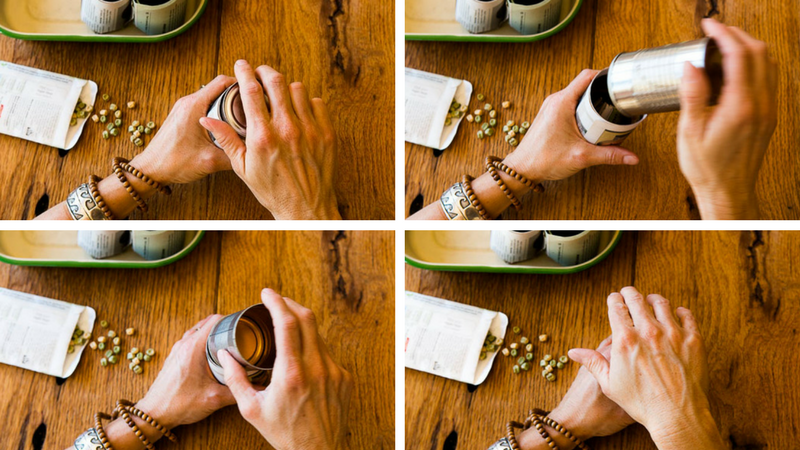
5. Now, remove the can from the pot. Flip the can over so the intact side of the can is facing down, and push the can back into the pot. Use the can to press the folds together at the bottom of the pot. If you can’t get the can back into the pot, it’s been rolled too tightly. That’s okay. You can either reach in and press the folds together with your fingers or start over.
6. Pull the can back out and wa-lah! You have a paper pot!
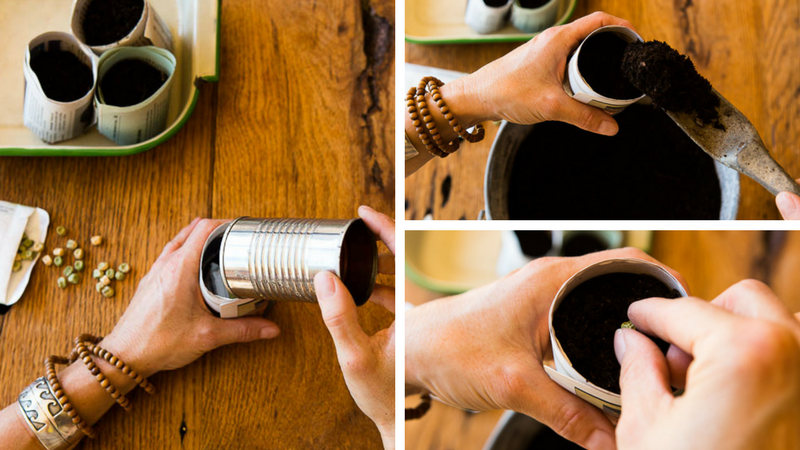
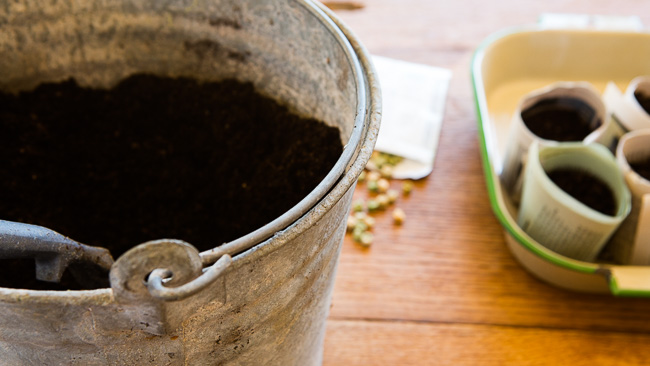
7a. Fill your pot with soil, sow your seed or three depending on what you’re planting, label what you’ve planted, and place it in your tray. The tray will keep the pots upright (they tend to tip to one side or the other). Pack as many together as possible.
7b. Or make a short assembly line to speed up the process. First make a bunch of paper pots in one go and then fill them with soil and seeds. (This is how I like to make them and, if I have extras, they go into a bag as a head start for a different planting day.)
8. Once all your seeds are sown, pots are labeled, and arranged in a tray of some sort, fill the tray one quarter to half full with water and place it in a sunny location or your favorite seed sowing spot, keeping in mind the needs of plants your growing.
For more tips on growing plants from seed:
Transplanting Seedlings Vs. Direct Sowing Seeds
6 Things to Remember When Planting Seeds
Seeds 101: Seed Selection & Terminology
Watch this video of how to make paper pots:
Making Paper Pots for Seed Starting

Another day and another tray of seedlings. Aren’t they sweet. Love sugar snap peas.
Listen
Buy The Book
Special offers
Newsletter Signup
Archives
Disclosure
Pass The Pistil is a participant in the Amazon Services LLC Associates Program and other affiliate programs such as Etsy, affiliate advertising programs designed to provide a means for sites to earn fees by advertising and linking to curated affiliate sites.

